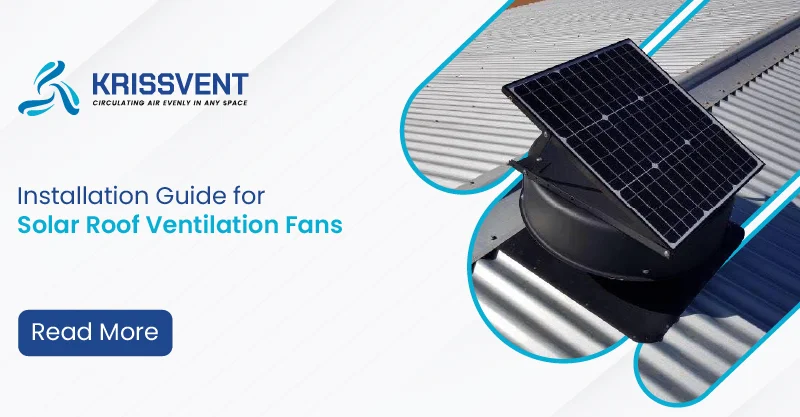
Installing a Solar Roof Ventilation Fan is one of the easiest ways to improve airflow, reduce heat, and lower energy costs. With the right tools and careful steps, you can have your solar auto vent fan working in no time — whether it’s for your home attic, warehouse, or industrial shed.
This guide covers everything you need to know for a safe, effective installation.
Why Proper Installation Matters
A well-installed Solar Roof Ventilation Fan ensures:
- Maximum sunlight exposure for optimal fan performance.
- Leak-proof fit to prevent rainwater issues.
- Smooth airflow without obstructions.
Pre-Installation Checklist
Before you begin, make sure you have:
- The correct fan model for your roof type (metal sheet, tile, or flat roof).
- Basic tools: measuring tape, pencil, drill, jigsaw, sealant, and screws.
- Safety gear: gloves, helmet, non-slip shoes, and a sturdy ladder.
- A clear day — no rain or high winds!
Step-by-Step Installation
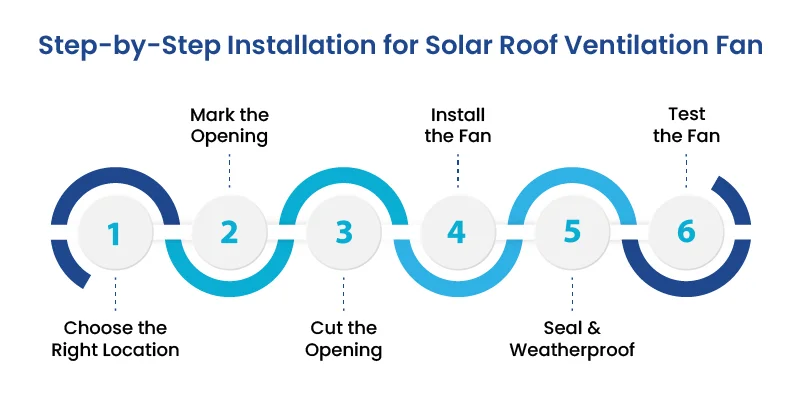
Step 1: Choose the Right Location
- Pick the sunniest spot on your roof — south-facing areas get the best sunlight.
- For attics, install near the roof peak for maximum hot air extraction.
- Avoid shaded spots or areas blocked by trees or chimneys.
Step 2: Mark the Opening
- Use the fan’s base as a template to trace the hole outline.
- Double-check your measurements to avoid errors.
Step 3: Cut the Opening
- Drill a starter hole inside the marked outline.
- Use a jigsaw to carefully cut along the traced line.
- Wear safety goggles to protect your eyes from debris.
Step 4: Install the Fan
- Insert the Solar Roof Ventilation Fan into the opening.
- Secure it with screws or mounting brackets as per the manufacturer’s instructions.
- Ensure the solar panel is angled correctly for maximum sun exposure.
Step 5: Seal & Weatherproof
- Apply roofing sealant around the edges to prevent leaks.
- Check that the fan’s flashing overlaps the shingles or roof sheets properly.
Step 6: Test the Fan
- Wait for sunlight to hit the panel — the fan should start automatically.
- Listen for smooth operation; there should be no unusual noise or vibration.
Use Cases: Where to Install
Residential Attics: Keep living spaces cooler by removing hot attic air.
Warehouses & Industrial Sheds: Complement Industrial Fans or an Industrial Exhaust Fan for better air movement.
Commercial Roofs: Supports HVAC systems and helps cut cooling costs.
Combining a Solar Roof Ventilation Fan with an Industrial HVLS Fan can boost airflow efficiency in larger buildings.
Safety Tips
- Never install on wet or windy days.
- Always use a sturdy ladder and have someone nearby for assistance.
- If you’re unsure, hire a licensed professional installer — especially for industrial roofs.
Want an expert to install your Solar Auto Vent Fan?